Plans Bookshelf With Secret Drawer
Bookcase of Secrets
Updated: Feb. 25, 2022
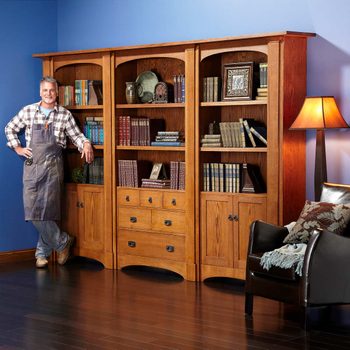
Can y'all keep a undercover? This bookcase contains more than than meets the middle. Behind the magnificent Arts and Crafts styling, in that location are 10 hidden compartments. Some are big, some are small, but they're all easy to build, and most of them don't reduce regular storage space at all. I splurged on the wood and built this bookcase with rift-sawn red oak for a total materials cost of $700. The straight-grain lines of rift-sawn oak give article of furniture an accurate Arts and crafts await. Only yous could use rotary-cut plywood and plain- sawn solid oak and cut your costs by about $225. Either mode, it's a deal price for an heirloom like this—even if you don't accept anything to hide.
You might also similar: TBD
Buy This PDF & Cut List
It may look complicated, but this bookcase is mostly a collection of plywood boxes dressed upwardly with solid woods: drawer boxes, cabinet boxes…even the columns are naught more than than tall, skinny boxes with decorative faces. The bridges, too, are just shallow boxes with arched fronts. If you can build boxes, yous can build this bookcase.
All of the components are separate units, so you can easily disassemble the whole bookcase in a few minutes— that's bang-up for finishing, even amend for moving the bookcase into the business firm.
Secret Spaces
Six types of secret compartments are shown here. If you use each available space for the cloak-and-dagger compartments then you'll take a total of x!
Column Compartment 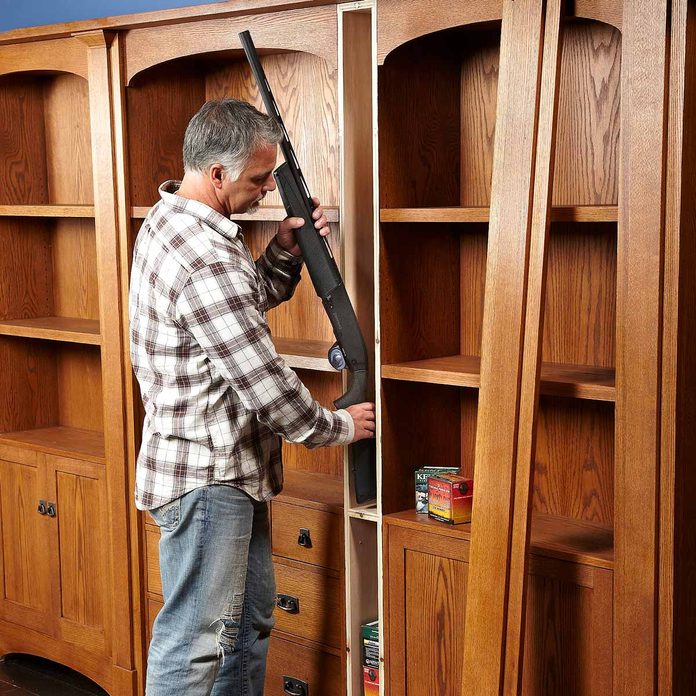
The column face is held in place by magnets. Give it a hard tug for instant admission. Build merely 1 column this way—or all four.
Overhead Hiding Identify 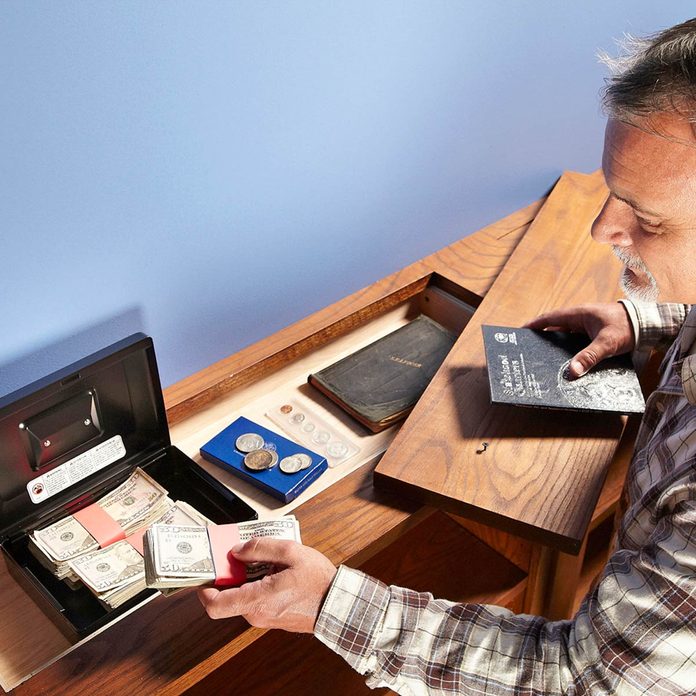
Each of the summit's 3 lift-off panels covers a shallow box. You'll need a ladder to reach them, and so they're best for long-term storage.
Drawer Nook 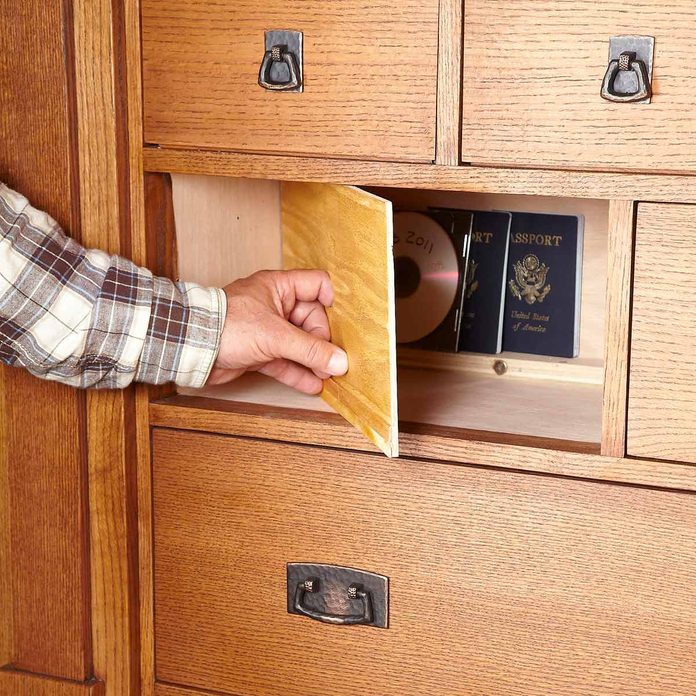
A shortened drawer box leaves space behind the drawer. Add a removable panel to hide a concealed cubby.
Hidden Hole 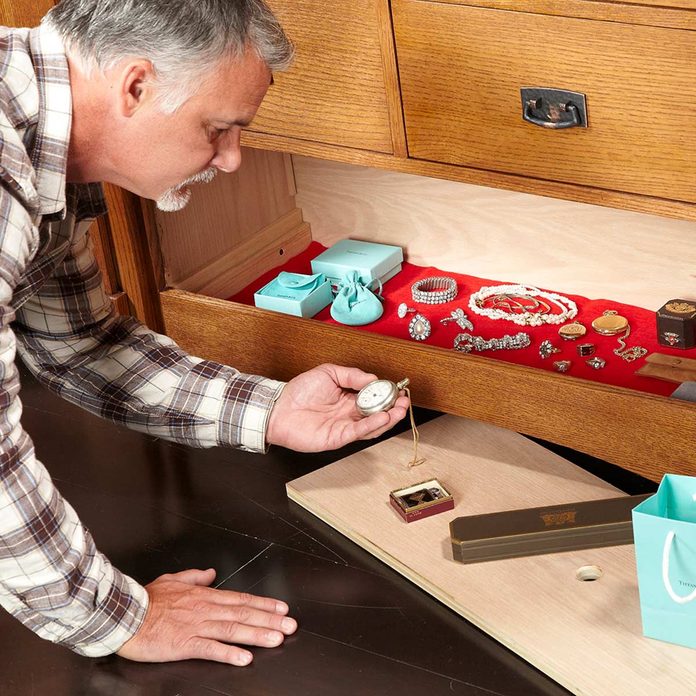
Remove the bottom drawer and elevator off the panel to reveal the hiding place.
Imitation-Lesser Drawer 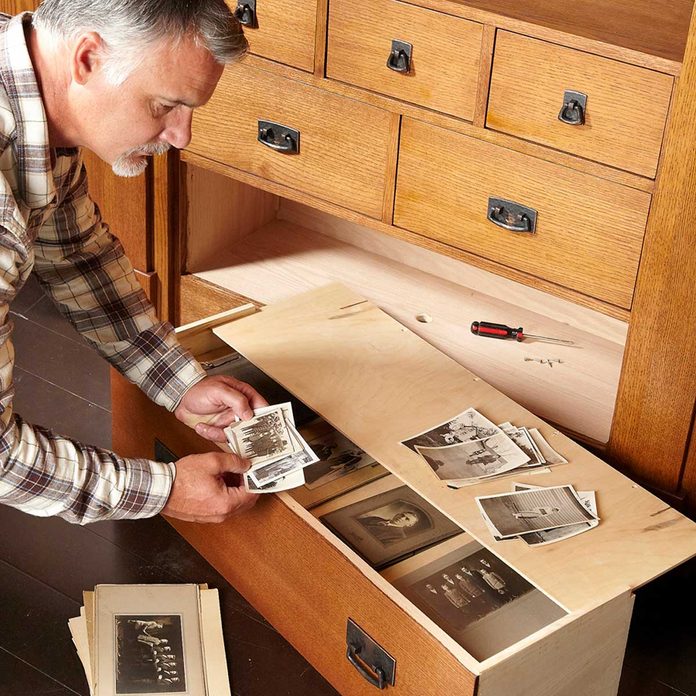
Flip the drawer over, remove a few screws and slide out the lesser panel.
Hang-up Box 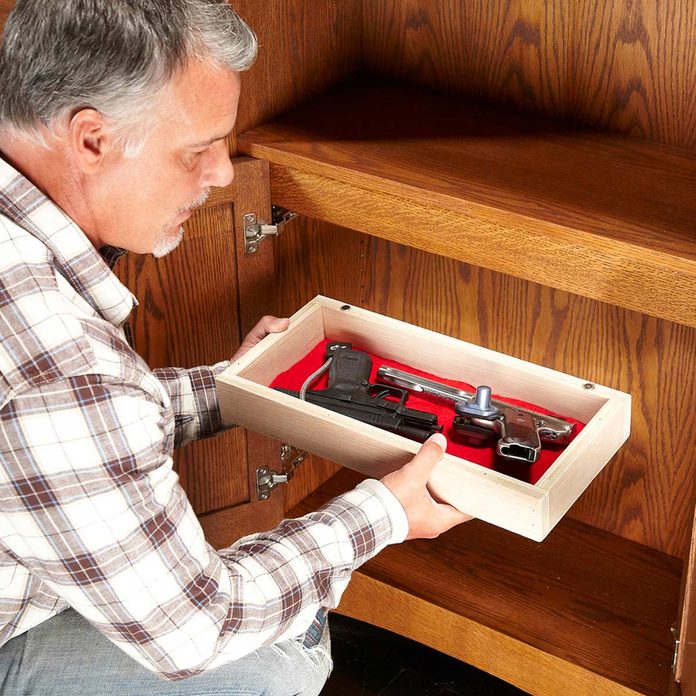
The cabinet fake track hides a drop-down box that's supported past magnets.
Project Directions
Stride 1a: Build Boxes out of Plywood
Start with the cavalcade box sides (A and B). Rough-cut 2 sheets of plywood to 80-1/iv in. with a round saw. Then trim them to their final length of 80 in. using a straightedge and a router fitted with a affluent-trim bit. This volition requite you a perfect edge. Mark the dado locations on the plywood and cut them (Photo to a higher place). Note: Yous'll have to add your own bearing to the plywood chip.
Step 1b: Cut Four Dadoes in One Laissez passer 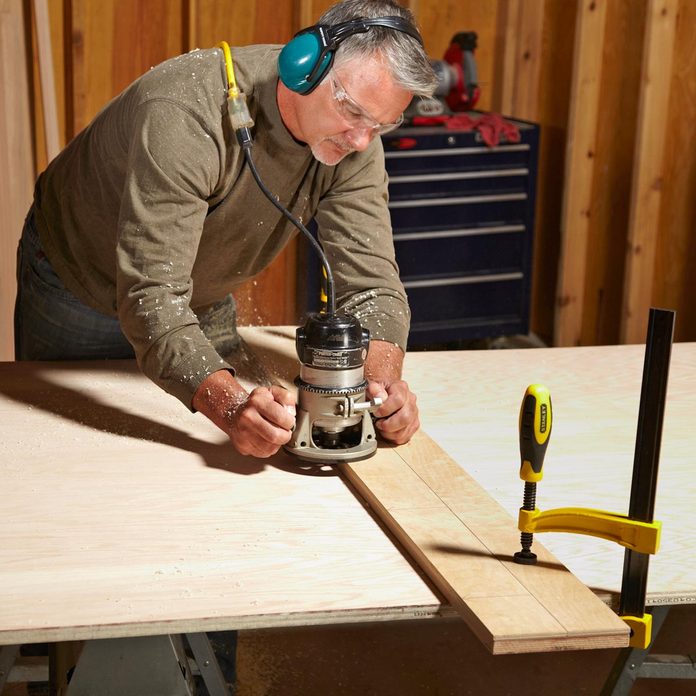
Repeat the procedure for the cabinet sides (C), cutting the plywood to 30-in. lengths first. You can become the four sides for the door cabinets from a unmarried width of plywood. Note: The lesser dado on the drawer cabinet is lower than on the door cabinets in social club to create the hidden compartment beneath the lower drawer. With the column and cabinet sides cut and machined, the next stride is to lay out and drill the adaptable shelf holes.
Cut the shelf parts for the columns (S and T) and cabinets (F and G) and cutting the dadoes and rabbets equally shown. Concord off on the chiffonier tops (D and E). Yous want to assemble the chiffonier first to finalize the top dimensions. Dry-fit all the parts to brand certain everything goes together right. I pre-finished the interior parts of the door cabinets earlier assembly. Tape off the dadoes to continue them free of stain and varnish.
Make sure the cabinets are square earlier you lot bulldoze whatsoever screws. The drawer cabinet is assembled from the within out, starting with the shelves and dividers. With the cabinets assembled, you can determine the final measurements for the tops and the upper compartment bottoms (D and E). You'll likely have to adjust the sizes given in the Cutting Listing. Tiny differences in plywood thickness and dado depth can add up to a cabinet that'southward a piddling narrower or wider than the listed dimensions. It's essential that the tops fit perfectly flush to the cabinet sides. Notation: The span bottoms (D and E) are the aforementioned size as the chiffonier tops and should exist cutting at the same time. With the tops cut to last sizes, lay out and cut the dadoes on the underside of the drawer cabinet height.
Step 2: Get together the Cabinets and Columns

Get together the cabinets and columns with glue and screws (photograph to a higher place). Glue and clamp the tops to the cabinets. Screws and a little gum are fine for most of the associates; screw heads will be covered up subsequently. Only utilize clamps rather than screws on the outer sides of both terminate columns.
Step iii: Add together the Compartments
OK, seven boxes downward; in that location are just three to get. Fourth dimension to build the span boxes that practice double duty as cloak-and-dagger compartments.
It's critical to build the bridge boxes so they're exactly the aforementioned width and length as the chiffonier tops below. Fortunately, that's easy to do since the chiffonier tops and the compartment bottoms are identical. Just add the sides (P, Q and R) to the compartment bot- toms. Double-bank check your work by setting the bridge boxes on meridian of the assembled cabinets. They should line upwardly perfectly with the cabinet tops.
To build the secret compartment below the lesser drawer, simply cut and rout the compartment sides (HHH) and install them at the lesser of the drawer cabinet with screws. Cut the lid to the compartment (H) and drill a 1-in. finger hole. Ease the edges of the hole with a 1/viii-in. round-over chip.
To build the compartments behind the middle drawers: Cut the faux backs (FF) and spacers (GGG). Drill a pair of holes for the rare earth magnets toward the end and on the edge of each spacer. Secure the magnets with epoxy. Install the spacers at the back of the chiffonier (one reason to leave the chiffonier backs off for now). Epoxy four washers on the back of the imitation dorsum where the magnets make contact. Add a finger pigsty and you lot've got two more than hiding places.
Cut the two imitation rails (EEE) that hide the driblet-down boxes in the door cabinets and glue the drop-down box lip (FFF) centered on the lower border on the back. Position the simulated fronts in the cabinet to act as a stop for the doors (don't forget to consider the thickness of a felt or cork bumper). Fasten with mucilage and screws.
Build the drop-downwardly boxes (U, V, JJ) from scrap plywood. Embed two rare earth magnets in the pinnacle of the dorsum edge. Subsequently the epoxy has set, grab some leftover paint and goop upwardly the magnet faces. Set up the box in place and push upward on the back edge to mark the respective holes in the underside of the top. Drill and epoxy in the magnets under the meridian. Cut and fit the backs for the columns and the cabinets. Pre-finish the backs of the two door cabinets before installing them.
To complete the cabinets, cut and fit the hardwood trim (DDD) for the cabinets. Use mucilage and a brad nailer to spike the trim. Sand the hardwood affluent and smoothen.
Step four: Complete the Columns

Cut the column backers (MM), columns (NN) and column bases (PP). Go out the columns (NN) a little long. Machine the crown (LL); see Figure B to a higher place. Get together the crowns with glue (Photo above). Glue and your fingers are the all-time way to assemble the pocket-sized parts of the column crowns. Hold them together for a few seconds, then go out them undisturbed while the glue sets. Whatsoever forest glue will work, only molding mucilage bonds faster and won't run all over the identify. Next, machine the stock for the crown cap (QQ) and base (RR) and cutting to size. Y'all'll want to sand the individual parts to 180-grit earlier assembly.
Step 5: Set the Column Blocks

Lay out all the column face up parts on the column backer. Suit the final length of the column so all the parts fit per-fectly on the backer. Spiral the columns and bases to the backer through the back of the cavalcade backers. Nail and glue the crown base to the top of the column. Attach the crown with screws from behind and smash the cap in place. You should have four very squeamish- looking cavalcade faces that are ready to mount on the column boxes (Photo above).
Now add together the magnets. Drill a series of holes for 1/two-in. magnets in the edge of the column box. It'due south all-time to do this on a drill printing with a Forstner chip so the holes are flat and perpendicular, assuasive the magnets to lie perfectly flush. I spaced 4 magnets forth each edge of the column box and one in the middle of each shelf for a total of 11 magnets. Epoxy the magnets into their holes. Use the paint play a joke on mentioned earlier to marking the location for the magnets in the column backer. Set the column on the box and the paint will leave marks where the other magnets become. Drill magnet holes and epoxy in the magnets, taking intendance to orient the magnets correctly so they grab the magnets in the column boxes and don't repel them.
If you don't want a secret compartment in a column, just gum the columns to the column boxes. Position the columns then they overhang the edges of the boxes by 1/iv in. on the sides. Secure with a few brad nails and clamp.
Stride half-dozen: Assemble the Whole Thing

When the columns are complete, bring together them to the cabinets (Photograph to a higher place). Spiral through the cabinet boxes into the columns. To install each bridge, clamp it in place and then add together screws. Now stand back and admire your work. Then go back to work and install the backs that embrace the space between the columns to a higher place the cabinets.
Step 7: Make Perfect-Fitting Meridian Panels

I went all out on the tiptop and fabricated it out of glued- up 1-one/4-in. solid oak (KK). Get-go, glue up the boards to make ane solid top. To create tight-fitting access panels with an uninterrupted grain blueprint, showtime with a glued-upwardly blank. Make the blank about an inch oversize in length and 1/2-in. extra in width.
Clamp up the meridian using the access panels every bit spacers between the blocks. Old business concern cards work great as spacers around the admission panels. Exist careful not to glue the panels in place.
Adjacent, rip a ii-in. strip off the back edge and a 4-1/4-in. strip off the front and prepare them bated. Accept the eye section and cross- cut the panels and blocks in sequence (see construction drawings figure b). Reassemble the superlative using the console cutouts every bit spacers (Photo above).
Step 8: After the Gum has Set

After the mucilage has set, you lot can remove the panels and trim the edges for a clean fit. The result is a top with access panels that fit perfectly without a lot of fussy fitting. The grain pattern is uninterrupted, which helps continue the panel visibility low.
You could build up 3/4-in. and 1/2-in. plywood to make the top. It's a piddling more work, just it will save you lot some money. To get the ten-ft. length out of eight-ft. plywood, you need to stagger the joints betwixt the 3/four-in. plywood and the 1/2-in. plywood. Cut one length of each to 6 ft. and the other to 4 ft. and butt- joint them end-to-end with biscuits and glue. Glue the 1/2-in. plywood to the iii/four-in. plywood with the barrel joints staggered and then the 4-ft. length of i/two-in. falls nether the vi-ft. length of 3/4-in plywood. Use screws to clamp the two pieces together, taking care not to leave any screw heads exposed where the top overhangs the cabinets (use clamps in these areas). Rip and cut the access panels in the same manner as with the hardwood peak, so add together hardwood trim to embrace the plywood edges.
Pace nine: Build the Drawers and Doors

Cutting the door parts (HH, ZZ, AAA and BBB) and get together with biscuits. Plywood works fine for the panels, although I think you get a better look with real hardwood panels. The drawers are put together with unproblematic rabbet joints. Assemble the drawers and doors with glue and a brad nailer. I recommend reinforcing the drawer joints with a few trim head screws. The screws guarantee the joints won't pull apart, and the trim heads aren't much bigger than a cease boom hole. The Cutting List for the doors and drawers will give you an exact fit in a perfectly executed cabinet. Measure the openings and conform your cuts accordingly. Shoot for an exact fit; then plane the door edges for a final fit.
The bottom drawer has a false bottom that hides the last of our underground compartments. All the same, there's nothing special about the construction of this drawer other than the stock-still faux bottom and the actress grooves cut to firm information technology.
The drawer bottoms are sized to stick out past the back of each drawer past i/four in. The protruding bottom acts every bit a drawer stop against the back of the cabinet. This as well allows y'all to easily fine-tune the fit. Only aeroplane the plywood edge to adapt how far back the drawer sits in the cabinet.
Stride 9: Finish

Now, take the bookcase apart. Finish-sand everything to 180 grit. I used a Mission Oak stain (see the Heir-apparent's Guide) and topcoated with a wipe-on gel varnish. Additionally, there is no need to finish the areas that embrace each other such as the outsides of the lower cabinets and the lower parts of the columns.
Relish your bookcase and try not to tell everyone about the hugger-mugger compartments. It's our trivial secret.
Purchase This PDF & Cutting Listing
Originally Published: September 01, 2017
Source: https://www.familyhandyman.com/project/bookcase-of-secrets/
0 Response to "Plans Bookshelf With Secret Drawer"
Enregistrer un commentaire